All screenshots are copyrighted by LawLogix Group, Inc.
Rehires, Re-verifications, and Name Changes are updates to the Form I-9 completed through a Section 3 Entry.
Rehires
All rehires with a break in service must have an I-9 action. Please follow the steps below.
1. Update Employment History
- Go to the Employee Page (select their name from either Employees or I-9 Forms page).
- Select the "Job Details" tab on the top horizontal menu.
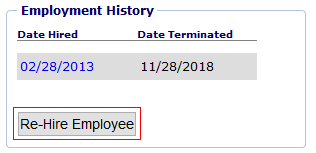
- Ensure correct employment dates are entered under Employment History so they mirror OMNI hire and termination dates.
- Terminate employee record prior to re-hiring if not already terminated.
- Click "Re-Hire Employee" and enter the correct Re-Hire Date.
- Do not change the original hire to the new rehire date as opposed to terminating and rehiring the record.
2. Update the Form I-9
- Rehire Situations
- New Form I-9 Required
- If the employee's original Form I-9 was never sent to E-Verify, a new Form I-9 is required in order to create an E-Verify case.
- See below on how to view E-Verify Cases.
- If the employee's original Form I-9 was created over 3 years ago today a new Form I-9 is required.
- Section 3 Rehire Entry Allowed
- If the employee's original Form I-9 was created less than three years ago and was sent to E-Verify, complete a Section 3 Rehire Entry on the previously completed Form I-9.
- New Form I-9 Required
- How to Complete a Section 3 Rehire Entry
- Confirm work authorization documents used on original I-9 are still valid
- If work authorization has expired, Section 3 Reverification is also required in addition to the Section 3 Rehire Entry
- Go to the employee's Form I-9 Page
- Click on the I-9 Number if searching using the "I-9 Forms" Search Page.

- Click on the "I-9 Forms" tab of the Employee Page
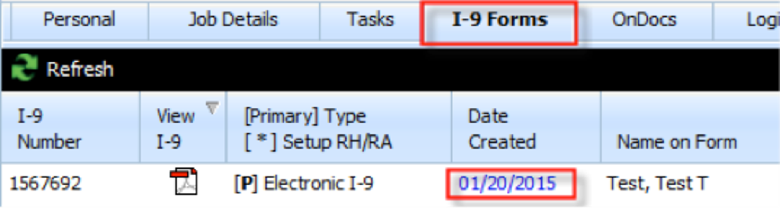
- Click on the "Date Created" of the most recent Form I-9
- Scroll down to the bottom of the page to the "Section 3" Box and click the "+Add" button on the black horizontal bar.

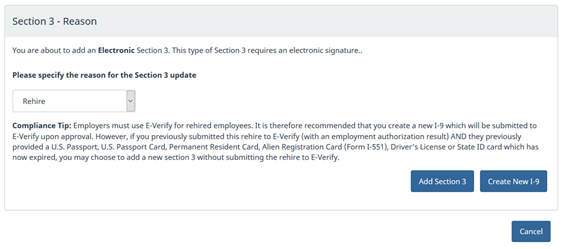
- Specify the reason as "Re-Hire" and then click "Add Section III Entry!"
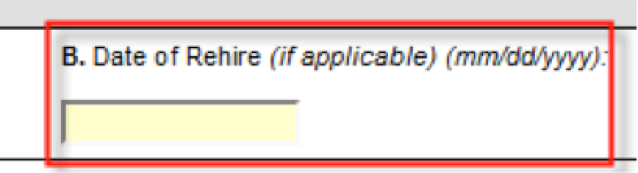
- In the box labeled "B. Date of Rehire," enter the new hire date.
- Enter your Guardian password and click "Electronically Sign."
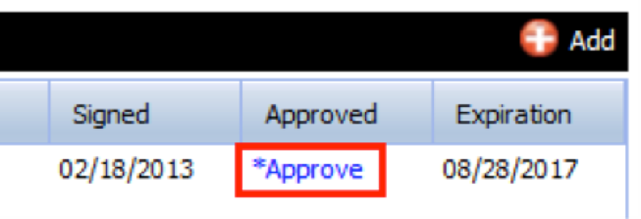
- Approve the Entry! Scroll back down to the Section 3 Box to Approve the Section 3 Entry by clicking on the blue "Approve" link and sign to approve the entry.

- How to Create a New Form I-9
- Select "Start I-9" Page on left vertical menu
- Enter, or have the new employee enter, their SSN to search Guardian for their profile if already entered. If not found, select "Create New I-9"
- If found, Update Employment History with their rehire date, then select "Create New I-9"
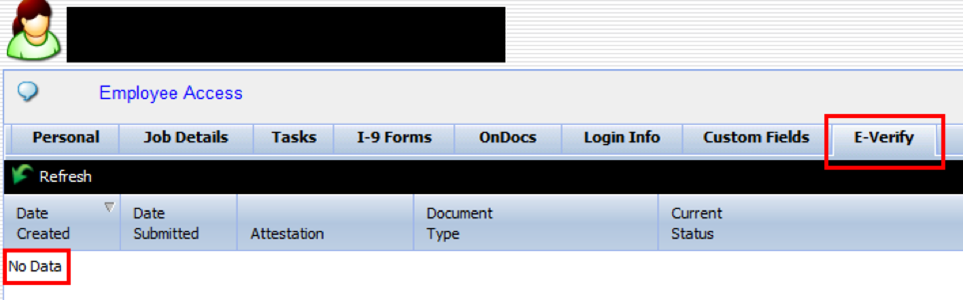
- How to view E-Verify Cases:
- Go to the Employee Page (click on the employee's name).
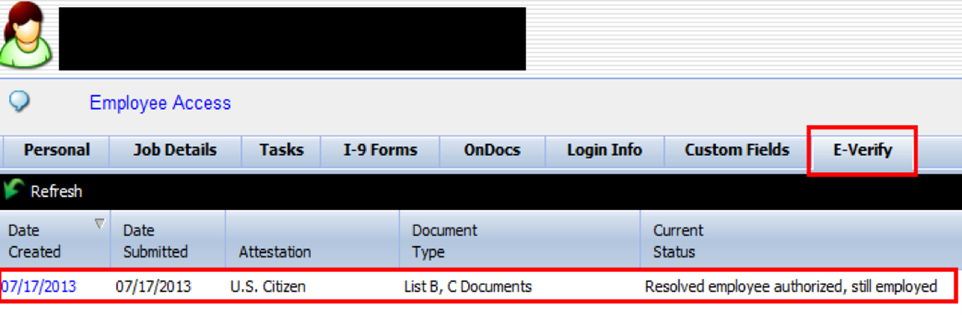
- Click on the "E-Verify" tab on the top right.
- If "No Data" is found than no E-Verify case was submitted and a new I-9 is needed.
- If data appears, like below, then an E-Verify Case was submitted.
- How to View the Form I-9 Age:
- Go to the employee's Form I-9 Page
- Click on the I-9 Number if searching using the "I-9 Forms" Search Page

- Click on the "I-9 Forms" tab of the Employee Page
- If Section 1 was signed over 3 years prior to the new hire date, the Form I-9 is expired and requires a new Form I-9.

- Ignore the Date Completed and Approved
Re-verifications
When an employee's employment authorization expires, an employer must re-verify that the employee is still authorized to work.
Employees must bring their new original work authorization documents in order to re-verify their Form I-9.
Changes in Citizenship status requires a new Form I-9.
- Alien authorized to work becomes Permanent Resident
- Permanent Resident becomes U.S. Citizen
How to Create Section Re-Verification Entry:
- Go to the "Top Pending Re-Verifications" Dashboard
- Select the "Date I-9 Created" for the employee requiring re-verification.
- Scroll down to the bottom of the page to the "Section 3" Box and click on the "+Add" button on the black horizontal bar.
- Specify the reason as "Re-Verification" and then click "Add Section III Entry!"
- In area C, select the document being used to update their work authorization, enter the Document # and new Expiration Date.
- Enter your Guardian password and click "Electronically Sign."
- Approve the Entry! Scroll back down to the Section 3 Box to Approve the Section 3 Entry by clicking on the blue "Approve" link and sign to approve the entry.
Instructions to complete a Re-Verification for specific Visa types

- F-1 Students and J-1 Exchange Visitors presenting DS-2019 or I-20
- 1. "Unexpired Foreign Passport with Attached I-94 or I-94A and I-20 or DS-2019"
- 2. SEVIS Number ("N number" from top right of form)
- 3. Expiration date from DS-2019/I-20 sponsored by FSU
- H-1Bs, TNs, O-1S, and O-2s presenting I-94s or I-797As with attached I-94s
- 1. "Unexpired Foreign Passport with Attached I-94 or I-94A"
- 2. I-94 #
- 3. Expiration Date from I-94
- OPT, STEM, J-2s, Q-1s, E-1s, and E-2s presenting EAD Cards (I-766s)
- 1. "Unexpired Employment Authorization Card issued by DHS with photograph (I-766)"
- 2. EAD Card # (3 letters 10 numbers - see Sample Documents Page)
- 3. Expiration Date from EAD Card
Do not re-verify:
- U.S. Citizens - U.S. Passports or Social Security Cards
- Lawful permanent residents who presented a Permanent Resident Card (Form I-551)
- List B documents (photo IDs need only be valid at the point the I-9 is completed)
- Updated work authorization that includes a change in attestation. For example, an employee who attested as "An alien authorized to work" whose work authorization expired and is now attesting as "A lawful permanent resident".
- In these situations a new I-9 is required.
Automatic Extensions
There are a few situations where one who files for a work authorization extension receives an automatic extension of their work authorization without an approval document physically in hand.
How to update the Form I-9:
- Send copies of required documents to the University I-9 Administrator in order to enter the "special amendment" extending the Form I-9 until approval documents are physically received for a Reverification.
Employment Authorization Documents (EADs) in Certain Circumstances
- Certain EAD categories who file an Application for Employment Authorization to renew their EADs may receive automatic extensions of their employment authorization and/or EAD for up to 180 days. The extension begins on the date the EAD expires and generally continues for up to 180 days, unless USCIS denies the renewal application. The auto extension depends on the following requirements:
- Employees must have timely filed an application to renew their employment authorization and/or EAD on Form I-765, Application for Employment Authorization, before the EAD expires (except certain employees with Temporary Protected Status (TPS)), and the Form I-765 renewal application remains pending;
- The eligibility category on the front of the EAD is the same eligibility category as on the employee’s Form I-797C, Notice of Action (except employees with TPS who may have a C19/A12 combination and for H-4, E, and L-2 dependent spouses, an unexpired Form I-94 indicating H-4, E, or L-2 nonimmigrant status must accompany Form I-797C); and
- The qualifying eligibility categories for a 180-day automatic extension are A03, A05, A07, A08, A10, A17*, A18*, C08, C09, C10, C16, C20, C22, C24, C26*, C31, and A12 or C19. The eligible categories are published on the USCIS; Automatic EAD Extension page. Some category codes on the EAD may include the letter ‘P’ such as C09P. Employers should disregard the letter ‘P’ when comparing the category code on the EAD with the category code on the receipt notice. *Only certain employees who file a Form I-765 renewal application within categories A17, A18 and C26 are eligible for an automatic extension.
- An EAD that appears on the face of the card to be expired is automatically extended when the employee also presents a Form I-797C that shows a timely filed EAD renewal application in the same employment eligibility category as the EAD.
- Documents needed to update Form I-9:
- Most recent EAD Card
- I797C, Notice of Action
- Reverification:
- Once new EAD Card is received a Reverification on the Form I-9 will be required
F-1 OPT STEM 180 Day Extension
- 180 day extension beyond expiration date of current EAD Card
- Eligibility:
- STEM Petition must be submitted prior to current EAD Card expiration date
- Student must be on post-completion 12-month OPT
- Documents needed to update Form I-9:
- Most recent Form I-20 endorsed by FSU
- Most recent EAD Card
- Reverification:
- Once new EAD Card is received a Reverification on the Form I-9 will be required
H-1B, TN, O-1, O-2 240 Day Extension
- 240 day extension beyond expiration date of current Form I-94
- Eligibility:
- Extension Petition, I-129, must be submitted prior to current Form I-94 expiration date
- Documents needed to update Form I-9:
- I-129
- I-797C ("receipt" sent by USCIS after I-129 is received)
- If time sensitive a FedEx/UPS delivery notice is acceptable.
- Reverification:
- Once new Form I-94 (will be attached to I-797A Approval Notice) is received, a Reverification on the Form I-9 will be required
TPS Auto-Extension
- If a country's Temporary Protected Status (TPS) is extended via a Federal Register Announcement, than beneficiaries with the most current TPS EAD Card (Category A-12 or C-19) can have their status automatically extended to the full length of the extension without a new EAD Card.
- Eligibility:
- Possesses the most recent TPS EAD Card
- Should apply for new EAD Card to receive next auto-extension
- Documents needed to update Form I-9:
- Most recent EAD Card.
- Reverification:
- Not needed unless new EAD Card with new expiration date is provided
Name Changes
If the employee has officially changed their name via marriage, divorce, or other official reason, a Section 3 Entry should be used to document the change. The name used on the Form I-9 should always match the name on their Social Security Card.
The employee must present their new original Social Security Card to prove their name change in order to update the Form I-9 with a Name Change.